Ето подробен текст за прахосмукачката Parkside за сухо и мокро почистване от Lidl. Мнения, недостатъци и предимства.
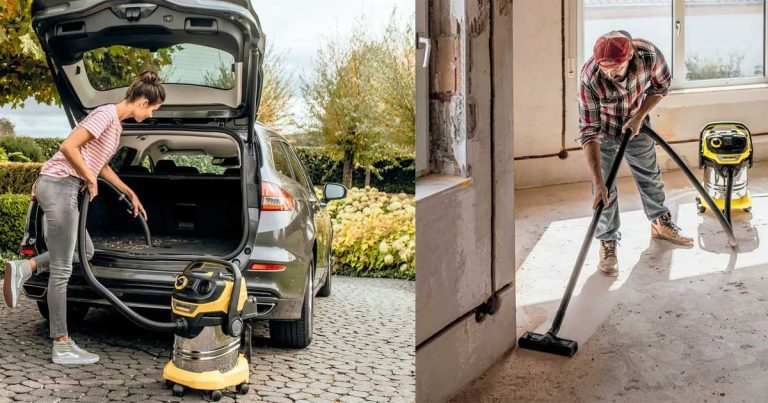
Прахосмукачката Parkside за сухо и мокро почистване е популярен модел, предлаган периодично в магазините на Лидл. Тя привлича вниманието на потребителите с достъпната си цена и многофункционалност. Моделът е подходящ както за стандартно почистване на прах и замърсявания от пода, така и за засмукване на течности.
Съдържание:
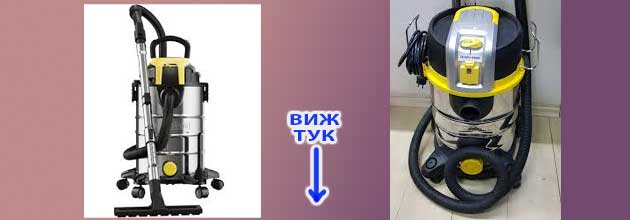
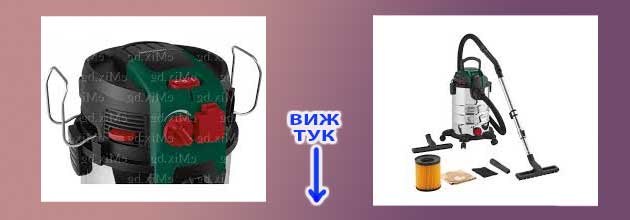
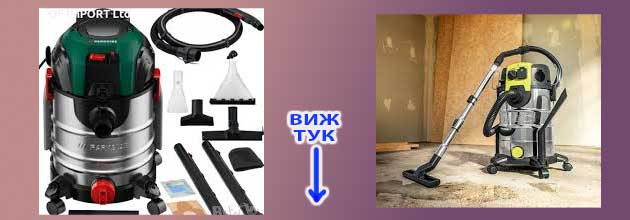
Корпусът е изработен от неръждаема стомана, което го прави устойчив на корозия. Прахосмукачката разполага с мощен мотор от 1300W или 1400W, в зависимост от конкретния модел. Комплектът включва различни накрайници за почистване на различни повърхности.
Недостатъци и минуси, мнения
Въпреки добрите си характеристики, прахосмукачката Parkside има и някои недостатъци. Някои потребители споделят, че уредът е доста шумен при работа, което може да бъде дразнещо при по-продължително използване. Друг минус е сравнително малкият обем на контейнера – около 20 литра, който се пълни бързо при по-обемно почистване.
ВАЖНО: Вижте още мнения за прахосмукачката за сухо и мокро почистване от Лидл, оставете и своя отзив за Парксайд или попитайте ТУК, в нашия форум с коментари!
Някои потребители отбелязват, че пластмасовите части на уреда изглеждат не особено здрави и издръжливи. Филтърът също се запушва сравнително бързо при засмукване на фин прах, което налага често почистване. Липсата на колелца за по-лесно придвижване е още един недостатък, споменаван от някои потребители.
Прахосмукачка Parkside от Lidl, мнения
Мненията на потребителите за прахосмукачката Parkside от Lidl са разнородни. Много хора са доволни от съотношението цена-качество, което предлага уредът. Йордан от София споделя: „За парите си върши чудесна работа. Използвам я вече 2 години за почистване на работилницата и колата и съм много доволен.“
Петя от Пловдив пък казва: „Харесва ми, че мога да я използвам и за мокро почистване. Справя се добре с разлети течности.“ От друга страна, има и по-критични мнения. Георги от Варна пише: „Шумна е и филтърът постоянно се запушва. Очаквах повече за тези пари.“ Мария от Бургас допълва: „Пластмасовите части ми изглеждат доста евтини. Не съм сигурна колко ще издържи при по-интензивна употреба.“
Погледнете и ТУК: Топ 10 за най-добра прахосмукачка против акари.
Мнения за качеството на почистването и резултати
Що се отнася до качеството на почистване, прахосмукачката Parkside се справя добре с повечето ежедневни задачи. Мощният мотор осигурява добра засмукваща сила, която е ефективна при почистване на прах, косми и по-едри замърсявания от различни повърхности. При почистване на килими и мокети резултатите са задоволителни, макар че някои по-упорити замърсявания може да изискват няколко минавания.
Функцията за мокро почистване е особено полезна при разлети течности или при почистване на автомобили. Уредът се справя добре и с по-едри отпадъци като стърготини или строителни отпадъци. Все пак, при работа с фин прах като гипс или цимент, филтърът бързо се запушва, което намалява ефективността.
Мнения за удобствата при почистване, поддръжка и предимства
Прахосмукачката Parkside предлага няколко удобства при почистване и поддръжка. Компактните й размери я правят лесна за съхранение и маневриране в по-тесни пространства. Смяната между режимите за сухо и мокро почистване става лесно, без нужда от сложни настройки. Контейнерът се изпразва сравнително лесно, а филтърът може да се измива, което удължава живота му.
Още нещо интересно ТУК: Колко време се пече телешко на фурна – сочно или бавно? С фолио и без.
Наличието на няколко накрайника в комплекта позволява почистване на различни повърхности и труднодостъпни места. Дългият кабел (обикновено около 5 метра) осигурява добър обхват без нужда от постоянно превключване между контакти. Едно от основните предимства е възможността за засмукване на течности, което разширява приложението на уреда.
Мнения за трайност и гаранция
По отношение на трайността, мненията са разделени. Някои потребители споделят, че прахосмукачката им служи без проблеми в продължение на години, докато други съобщават за дефекти след по-кратък период на употреба. Корпусът от неръждаема стомана определено допринася за издръжливостта на уреда, но пластмасовите части и аксесоари може да се окажат по-уязвими при интензивна употреба.
Lidl предлага стандартна гаранция от 3 години за този продукт, което е добър срок за уред в този ценови клас. В случай на проблем, клиентите могат да се възползват от сервизното обслужване на Lidl. Важно е да се отбележи, че гаранцията покрива фабрични дефекти, но не и повреди, причинени от неправилна употреба или нормално износване на консумативите като филтри и накрайници.
Вижте и ТОВА: Инсталиране на Вайбър на Андроид, Айфон и компютър. Тънкости и усложнения.

Марта Савова е журналист и писател, специализиран в областите здравеопазване, технологии и наука. С над 20-годишен опит в сферата, тя е публикувала множество изследователски статии и има страст към споделянето на знания. Марта е редовен сътрудник на различни медии.